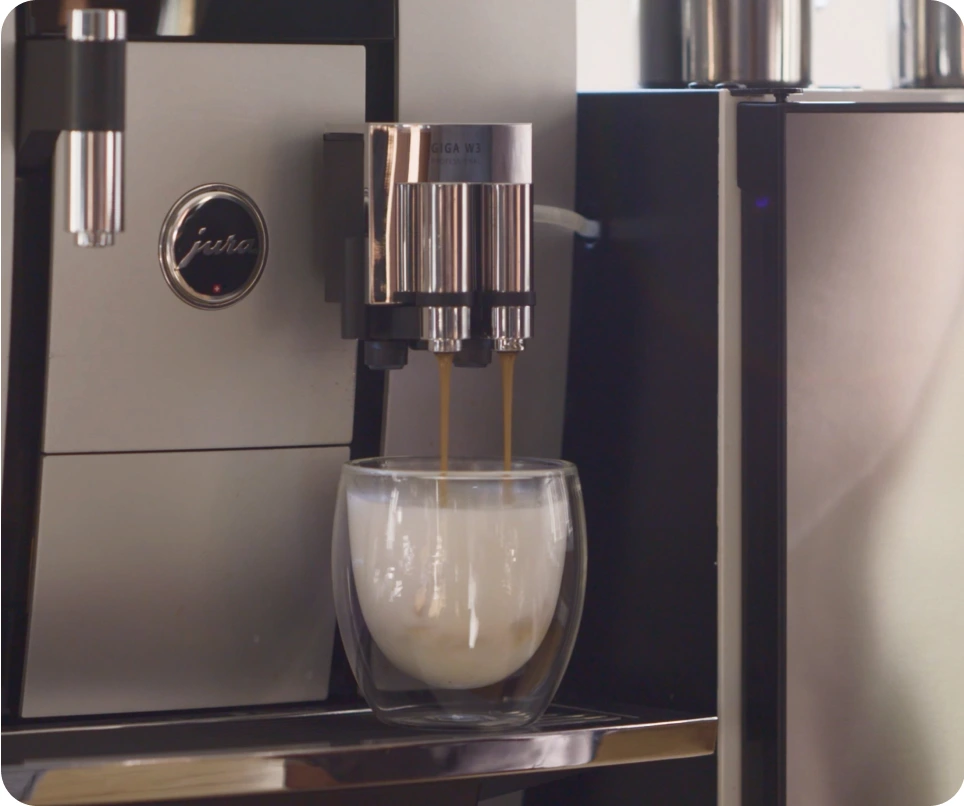
A coffee machine bean refill sounds like a tiny task, right up until the office machine coughs through a weak cup at 8:45 a.m. and a small line forms near the break room. If you want better timing, fewer grinder issues, and coffee that actually tastes like coffee, this guide shows exactly when to refill beans and how to do it without turning a two-minute job into a machine problem.
What you’ll need before you start
Before touching the machine, get the basics within reach. You need a fresh bag of compatible whole coffee beans, clean and dry hands or a clean scoop, and a quick way to check the machine’s prompts or manual if something on the screen looks unfamiliar. In most offices, that manual is either tucked into a drawer nearby or available through the machine’s settings menu or support page.
It also helps to know what kind of refill process your machine uses. Most office bean-to-cup machines keep whole beans in a top hopper, then grind each drink as it’s ordered. That means the refill itself is simple, but the details matter. The wrong beans, a damp hopper, or an overfilled container can cause annoying problems that look bigger than they are.
If your machine has a separate chute for pre-ground coffee, ignore that for bean refills. The hopper is for whole beans only. Think of it like filling the right tank in the first place. Easy, as long as you slow down for thirty seconds and check what you’re doing.
Step 1: check whether the machine actually needs a bean refill
Before opening the hopper, confirm that low beans are really the issue. Coffee machines can act strangely for several reasons, and refilling out of habit will not fix a blocked grinder path or a brew unit problem.
- Walk up to the machine and check the display or control panel.
- Run a simple black coffee if the machine still allows it.
- Pay attention to the sound during grinding.
- Look at the strength, volume, and consistency of the finished drink.
A proper check only takes a minute, and it keeps you from solving the wrong problem.
Look for on-screen alerts or indicator lights
Start with the obvious clue. Many office machines will show a message like “Add beans,” “Fill bean container,” or a low-bean icon when the hopper gets close to empty. Some models use a blinking light instead of text, especially simpler machines with fewer display options.
- Wake the screen if it is in sleep mode.
- Look for bean icons, warning triangles, or refill messages.
- Clear any previous pop-up messages so you can see the active alert.
- Confirm that the message refers to beans, not water, waste, or cleaning.
Checkpoint: if the machine directly asks for beans, you can move to the refill steps with confidence.
Notice changes in the coffee output
Machines do not always warn you early. Sometimes the first sign is in the cup. Coffee may come out shorter than usual, taste thin, or stop and start during brewing because not enough ground coffee reaches the brew chamber.
- Brew a standard black coffee.
- Watch whether the pour is steady or unusually uneven.
- Compare the volume to what that drink usually looks like.
- Taste it if needed, weak and watery often points to a low hopper.
This part matters because a machine can still have some beans left but not enough to grind each drink properly. It is like scraping the last cereal flakes from the box. Technically there is still something in there, but not enough for breakfast.
Listen to the grinder
The grinder sound changes when beans run low. A full, steady grinding sound becomes lighter, sharper, or hollow when the burrs are spinning with too few beans feeding through.
- Start a coffee and stand close enough to hear the grinder.
- Listen for a consistent, dense grinding sound at the start.
- Notice if the sound becomes airy, high-pitched, or uneven.
- Stop guessing if the grinder sounds mostly empty, that is usually your sign.
Checkpoint: if the sound changes and the drink is weak, a coffee machine bean refill is probably due even if the screen has not caught up yet.
Step 2: decide the best time to refill coffee beans in an office setting
Timing matters more in an office than at home. A refill during a rush slows everyone down, and waiting until the hopper is bone dry can trigger avoidable alerts, inconsistent drinks, or extra priming time.
- Watch when coffee demand is highest.
- Plan refills just before those busy windows.
- Avoid waiting for a complete empty hopper.
- Adjust the timing based on how many drinks your office makes each day.
A little routine here saves a lot of small interruptions later.
Refill before the morning rush
The easiest refill is the one nobody notices because it happens before the line starts. In many offices, that sweet spot is just before the first wave of coffees, often around 8:30 or 8:45 near the break room.
- Check the hopper first thing in the morning.
- Refill if the level looks low enough to cause trouble during the next hour.
- Wipe the lid and edges while you are there.
- Brew one test coffee before people start arriving.
That timing works because the machine is idle, the counter is clearer, and you are not trying to pour beans while someone waits for a cappuccino.
Refill when the hopper gets low, not bone dry
Waiting until there is nothing left is a bad habit. A nearly empty hopper can feed beans unevenly, and a fully empty hopper may need a few seconds or a cycle to pull beans back into the grinder path.
- Check the hopper level regularly.
- Refill when the beans drop low enough to expose much of the bottom area.
- Do not keep topping up tiny amounts every hour, but do not run it to dust either.
- Aim for a practical middle ground.
The trick is to treat low-bean refills like filling a printer tray before the last sheet jams the line. You are not wasting paper. You are preventing downtime.
Match refill timing to office traffic
Different offices burn through beans at very different speeds. A ten-person hybrid team may need a refill every few days. A busy workplace with visitors, meetings, and an all-day break room might need one every day, sometimes more.
- Notice how fast the hopper level drops over a few workdays.
- Match your checks to actual use, not assumptions.
- Add an afternoon check if lunch traffic is heavy.
- Tighten the schedule during events, training days, or client visits.
If coffee drinks spike every Tuesday or during monthly team meetings, build around that pattern instead of reacting once the machine struggles.
Step 3: choose the right beans for the machine
Not all beans behave well in office machines. The bag may look great on a shelf, but if the beans are oily, stale, or flavored, the grinder can suffer and the cups can get worse fast.
- Use whole beans made for automatic coffee machines.
- Skip heavily oily beans.
- Avoid flavored beans in the hopper.
- Check roast level and freshness before pouring.
Good beans do not just improve taste. They help the machine feed, grind, and brew the way it was designed to.
Use whole beans meant for bean-to-cup machines
The hopper is for whole beans. Pre-ground coffee belongs in a bypass chute only if your machine includes one.
- Read the coffee bag before opening it.
- Confirm the beans are whole, not ground.
- Use the bypass chute only for occasional pre-ground drinks.
- Never pour ground coffee into the bean hopper.
That sounds obvious, but it is one of those office mistakes that happens when someone moves too quickly.
Avoid oily or heavily flavored beans
Very dark, shiny beans often leave oil behind in the hopper and grinder. Flavored beans can do the same, plus they leave residue and lingering taste.
- Look at the surface of the beans.
- Avoid beans that look glossy or greasy.
- Skip flavored options in the hopper, even if the flavor sounds fun.
- Keep syrups separate for flavor, that is what they are for.
If your office wants vanilla or hazelnut, add it to the cup, not the grinder.
Check roast level and freshness
Beans that are too dark can feed poorly. Beans that are old can taste flat no matter how full the hopper is.
- Check the roast type on the bag.
- Pick medium or medium-dark beans if your machine runs best on cleaner, drier coffee.
- Use beans while they are fresh, not months after opening.
- Avoid pouring stale leftovers on top of fresh beans if you can help it.
Checkpoint: the right beans should feel dry, smell fresh, and move freely when poured.
Step 4: prepare the machine for a clean, quick refill
A fast refill is good. A clean refill is better. A little prep prevents stray moisture, syrup residue, or counter clutter from getting into the hopper.
- Clean and dry your hands or grab a clean scoop.
- Clear the machine area.
- Make sure nobody is mid-brew.
- Set the bean bag or container where you can pour steadily.
This step takes less time than cleaning up a spilled half-bag across the drip tray.
Wash and dry your hands or use a clean scoop
Beans should stay dry and clean. Moisture, lotion, or food residue from your hands can transfer into the hopper.
- Wash your hands if needed.
- Dry them fully.
- If using a scoop or container, make sure it is clean and dry.
- Keep damp cloths away from the open hopper.
Clear the space around the machine
Office coffee stations collect clutter fast. Syrup bottles, stir sticks, paper cups, lids, and random mail somehow end up around the machine.
- Move anything crowding the top or sides.
- Give yourself a stable place to hold the bean bag.
- Remove anything that could tip into the machine.
- Wipe up nearby splashes before opening the hopper.
Pause brewing if someone is using the machine
Do not open the hopper while the machine is actively grinding or brewing.
- Check the screen for an active drink cycle.
- Wait until the machine is idle.
- Let the grinder fully stop before opening the lid.
- Refill only when the machine is ready.
Checkpoint: an idle machine is quieter, safer to open, and less likely to throw an alert during the refill.
Step 5: open the bean hopper and inspect it before adding beans
Refilling without looking inside is how stale beans, clumps, and bean dust quietly build up. Take a quick look first.
- Open the hopper the right way.
- Check what is left inside.
- Look for clumps or dust.
- Make sure the hopper is dry before adding beans.
That small inspection often explains why the machine has been acting slightly off.
Find and open the hopper lid correctly
Not every hopper opens the same way. Some lids lift straight up, some slide, and some lock into place.
- Check for arrows, tabs, or a latch.
- Open the lid gently instead of forcing it.
- Set the lid somewhere clean if it comes off completely.
- Stop if it feels stuck and check the manual or machine prompts.
Check for old beans, dust, or clumps
Leftover beans are not always a problem, but stale beans, broken pieces, and dusty buildup can affect feeding.
- Look at the bottom and corners of the hopper.
- Check for excessive bean dust or broken fragments.
- Notice any clumping or beans sticking together.
- Remove visible debris only if your machine allows safe access.
Make sure the hopper is completely dry
Even a little moisture can cause beans to swell, stick, or bridge over the grinder opening.
- Look for condensation, damp spots, or residue.
- If you cleaned the hopper recently, confirm it is fully dry.
- Do not pour beans into a damp container.
- If needed, let it air dry before refilling.
Step 6: refill the hopper without overfilling it
This is the main event. Pour carefully, keep the level reasonable, and avoid trapping beans where the lid needs to sit.
- Open the bean bag or container securely.
- Pour slowly into the hopper.
- Stop below the max line.
- Clear stray beans before closing.
It sounds simple because it is. Most refill problems come from rushing.
Pour slowly to avoid spills
Beans bounce. A fast dump usually ends with coffee all over the counter.
- Hold the bag close to the hopper opening.
- Pour in a controlled stream.
- Pause if the bag feels awkward or too heavy.
- Use a smaller container first if needed.
Stay below the maximum fill line
Overfilling can crowd the hopper, affect bean movement, and make freshness worse.
- Find the max line or visual fill boundary.
- Stop before the beans press against the lid.
- Leave enough room for beans to shift naturally.
- Save the rest of the bag for the next refill.
Remove any stray beans before closing the lid
One bean in the wrong spot can keep the lid from sealing properly.
- Check the rim, hinge area, and nearby machine surfaces.
- Pick out any trapped beans.
- Brush away loose fragments or dust.
- Close only when the opening is clear.
Checkpoint: the hopper should be neatly filled, not packed, and the lid area should be clean.
Step 7: close the hopper and reset any refill prompt
After the refill, your machine may need a quick confirmation. Some machines recognize the refill automatically. Others wait for a tap, menu selection, or restart.
- Close the lid fully.
- Check the screen for prompts.
- Confirm the refill if asked.
- Wait briefly if the grinder needs to prime.
This step is where a lot of “but I already added beans” frustration begins.
Secure the lid fully
A crooked or loose lid can trigger warnings or stop the machine from returning to normal.
- Lower or slide the lid into place.
- Press gently until it sits flat.
- Confirm any latch or lock is engaged.
- Check that no bean is blocking the seal.
Follow the on-screen prompt, if there is one
Some machines need a little nudge.
- Read the prompt carefully.
- Tap the confirmation button if shown.
- Use the machine menu if it asks for a reset or acknowledgment.
- Wait for the home screen to return before brewing.
Wait for the grinder to prime if needed
Priming just means the machine needs a moment to pull beans back into the grinding path after running low or empty.
- Start a standard coffee if the machine suggests it.
- Let the grinder run through the first cycle.
- Wait a minute if the machine seems to be catching up.
- Do not keep pressing buttons rapidly.
Checkpoint: once primed, the machine should stop showing low-bean alerts and sound normal again.
Step 8: brew a test drink and check the result
Do not assume the refill worked perfectly just because the hopper is full. Brew one simple drink and check the basics.
- Choose a standard black coffee.
- Watch the grind and pour.
- Smell and inspect the finished cup.
- Listen for anything odd during the cycle.
A test drink is your proof that the machine is actually back in business.
Run a standard coffee first
Skip milk drinks for the first check. Black coffee makes it easier to judge what is happening.
- Select the machine’s regular coffee option.
- Avoid extra-large or specialty settings for the first test.
- Let the full cycle finish.
- Compare it to a normal cup from that machine.
Check aroma, crema, and pour time
A proper refill should bring the machine back to a fuller smell, steadier pour, and normal strength.
- Smell the coffee right after brewing.
- Look for a consistent flow during the pour.
- Check for normal crema if your machine usually produces it.
- Notice whether the brew time feels typical.
Watch for error messages or unusual sounds
If anything still seems off, catch it now instead of during the next rush.
- Read any alert that appears after brewing.
- Listen for harsh grinding, clicking, or empty spinning sounds.
- Stop and recheck the hopper if the machine struggles.
- Escalate if the same problem repeats after a proper refill.
Step 9: set a refill routine that fits your office
Guessing every day gets old fast. A simple routine keeps the machine ready without turning bean checks into a big production.
- Watch bean use for several days.
- Pick regular check times.
- Make ownership clear.
- Keep backup beans close by.
Once the rhythm is set, refills stop feeling like emergencies.
Track how fast the hopper empties
You do not need a spreadsheet for this. A few days of casual observation is enough.
- Check the bean level at the same times each day.
- Notice how much drops between morning and afternoon.
- Tie bigger drops to busier office days.
- Set your refill frequency based on what actually happens.
Assign ownership without making it complicated
If everybody assumes somebody else will do it, nobody does it.
- Pick one role to check the machine regularly.
- Add the task to a simple kitchen or facilities checklist.
- Keep instructions nearby for backups.
- Make the process easy enough that coverage is not a problem.
Keep backup beans nearby
The best backup beans are the ones you can grab without crossing the building.
- Store an unopened bag near the machine.
- Keep it sealed until needed.
- Check stock before it runs out completely.
- Replace the backup as soon as you open it.
That one habit can save the classic 2:15 p.m. moment when the machine sounds busy but nothing lands in the cup.
Step 10: store extra coffee beans the right way
Refilling the hopper is only half the job. The beans waiting in storage matter just as much.
- Keep extra beans sealed.
- Store them somewhere cool and dry.
- Protect them from heat and sunlight.
- Rotate older stock first.
Good storage keeps flavor cleaner and helps each refill perform the same way.
Keep beans sealed, cool, and dry
Coffee hates air, heat, and moisture.
- Leave unopened beans in their original sealed packaging if possible.
- Use an airtight container if the original bag is open.
- Store at room temperature.
- Keep beans away from humid areas.
Avoid storing beans beside heat or sunlight
A shelf near a hot water machine or sunny window is a bad spot.
- Pick a cabinet, closet, or shaded shelf instead.
- Keep beans away from warm appliance vents.
- Avoid window ledges or bright counters.
- Move stock if the storage area gets hot during the day.
Rotate older stock first
Older unopened bags should get used before newer ones.
- Put new stock behind older stock.
- Label bags with the delivery or opening date if helpful.
- Check the supply area during each refill.
- Use the oldest suitable bag first.
Step 11: clean around the hopper as part of the refill process
A little cleanup during each refill keeps the machine area nicer and helps prevent buildup from creeping into the wrong places.
- Wipe bean dust from the lid and edges.
- Inspect visible chute access if your machine allows it.
- Clean up any spills around the machine.
- Leave the station dry and tidy.
This is low effort and worth it.
Wipe away bean dust from the lid and edges
Coffee dust gets everywhere, especially around the hopper rim.
- Use a dry or barely damp cloth on exterior surfaces only.
- Wipe the lid, rim, and surrounding top panel.
- Remove loose dust before it spreads.
- Dry any touched area fully.
Check the chute area if your machine allows access
Only do a visual check if the machine is designed for it.
- Open any approved access point.
- Look for visible residue or blockage.
- Do not poke deep into the machine.
- Close the panel securely when done.
Keep the counter tidy to protect bean quality
Sticky syrup splashes and standing water do not belong near open coffee supplies.
- Sweep up spilled beans.
- Wipe up water or syrup near the machine.
- Move clutter that traps dust and residue.
- Keep the refill area clean for next time.
Step 12: know when a refill won’t solve the problem
Sometimes the machine acts empty when the hopper is not the issue at all. Knowing the difference saves time and keeps you from pouring in more beans that will not help.
- Check whether the hopper is truly feeding beans.
- Compare the machine’s behavior before and after refill.
- Look for repeat errors.
- Escalate persistent issues for cleaning or service.
Here’s the thing: a full hopper does not guarantee a working grinder path.
The hopper is full but the grinder isn’t pulling beans
If beans sit there and nothing feeds down, the problem may be bridging, clumping, oily buildup, or a grinder feed issue.
- Look for beans stuck in a dome shape above the feed opening.
- Check for oily or sticky beans.
- Reseat the lid and try a cycle if appropriate.
- Stop repeated attempts if no beans move through.
The machine brews weak coffee after a refill
Fresh beans in the hopper do not fix every weak cup.
- Consider whether the beans are stale.
- Check if the grind setting was changed.
- Notice if the brew path may need cleaning.
- Compare a second test cup before deciding.
The machine stops mid-cycle or cancels drinks
Repeated stop-start behavior usually points to something beyond low beans.
- Read the exact error message.
- Check for repeated cancellations after refill.
- Avoid forcing multiple retries in a row.
- Flag the machine for service if the issue continues.
Troubleshooting common coffee machine bean refill problems
Even when you do everything right, a few issues show up often enough to deserve quick fixes.
“Beans just got added, but the machine still says empty”
Start with the easy stuff.
- Open and reseat the hopper lid.
- Confirm any on-screen refill prompt.
- Run one brew cycle so the grinder can catch up.
- Wait a minute for the machine to update.
- Check that the beans are actually reaching the feed area.
If the alert stays after that, the machine may need service or a deeper cleaning.
“The grinder is noisy, but no coffee is coming through”
That usually means the machine is trying but not pulling beans correctly.
- Check for clumped or oily beans in the hopper.
- Look for a visible bridge over the feed opening.
- Confirm the hopper is not damp.
- Try a fresh batch of dry, suitable beans.
- Stop if the grinder keeps spinning empty.
“Coffee tastes off right after refilling”
The cause is often stale leftovers, poor bean choice, or contamination.
- Smell the beans in the hopper.
- Think about whether old beans were mixed with fresh ones.
- Check for flavored or oily beans.
- Make sure the hopper was dry and clean.
- Brew another cup after the first cycle clears the path.
“Beans keep spilling during refill”
That is usually a handling problem, not a machine problem.
- Pour from a smaller container.
- Hold the bag closer to the hopper.
- Refill in stages.
- Clear more space before starting.
- Slow down.
“The hopper empties faster than expected”
Sometimes usage just jumped.
- Check drink counts if your machine tracks them.
- Notice changes in office attendance.
- Look for larger cup settings or stronger recipes.
- Refill earlier on busy days.
- Keep more backup stock nearby.
What result you should expect after a proper refill
After a proper refill, the machine should sound normal, grind steadily, brew full drinks, and stop flashing low-bean alerts. The coffee should smell fresher, pour more consistently, and taste like the machine usually tastes on a good day.
That is your finish line. Not just a full hopper, but normal operation.
If your office machine still sounds hollow, brews weak coffee, or cancels drinks after a careful coffee machine bean refill, the issue is probably somewhere else. At that point, stop treating it like a bean problem and move toward cleaning, adjustment, or service.
Next steps: make refills easier from here on out
The easiest way to avoid coffee downtime is to make bean checks part of the daily rhythm, right alongside keeping cups stocked and wiping the station. Set one quick morning hopper check, keep compatible backup beans close to the machine, and store extras away from heat, sunlight, and the splash zone near syrups or the water station.
Try one simple change right away: check the hopper before the first coffee rush tomorrow morning. That one habit prevents most refill headaches before anybody notices the machine was getting low.
- Disclaimer: This article is for general informational purposes only. It is not professional advice, a quote, or a service agreement. Conditions at your home or property may differ; contact a qualified professional for an on-site evaluation before making repair, safety, or spending decisions.